
I had an old Rubbermaid tote in the garage we used. Here's how we make them:
Step 1 Drill 15-20 1/8" holes in lid and 15-20 holes around the top 1/3 of tote.

Step 2 Bottom bedding layer: 3"-4" Torn up cardboard (cereal boxes & toilet paper rolls) and newspapers; SLIGHTLY dampened

Step 3 Next a thin layer of kitchen food scraps (lettuce, apple peelings, carrot tops/bottoms, coffee grounds, tea bags, etc)
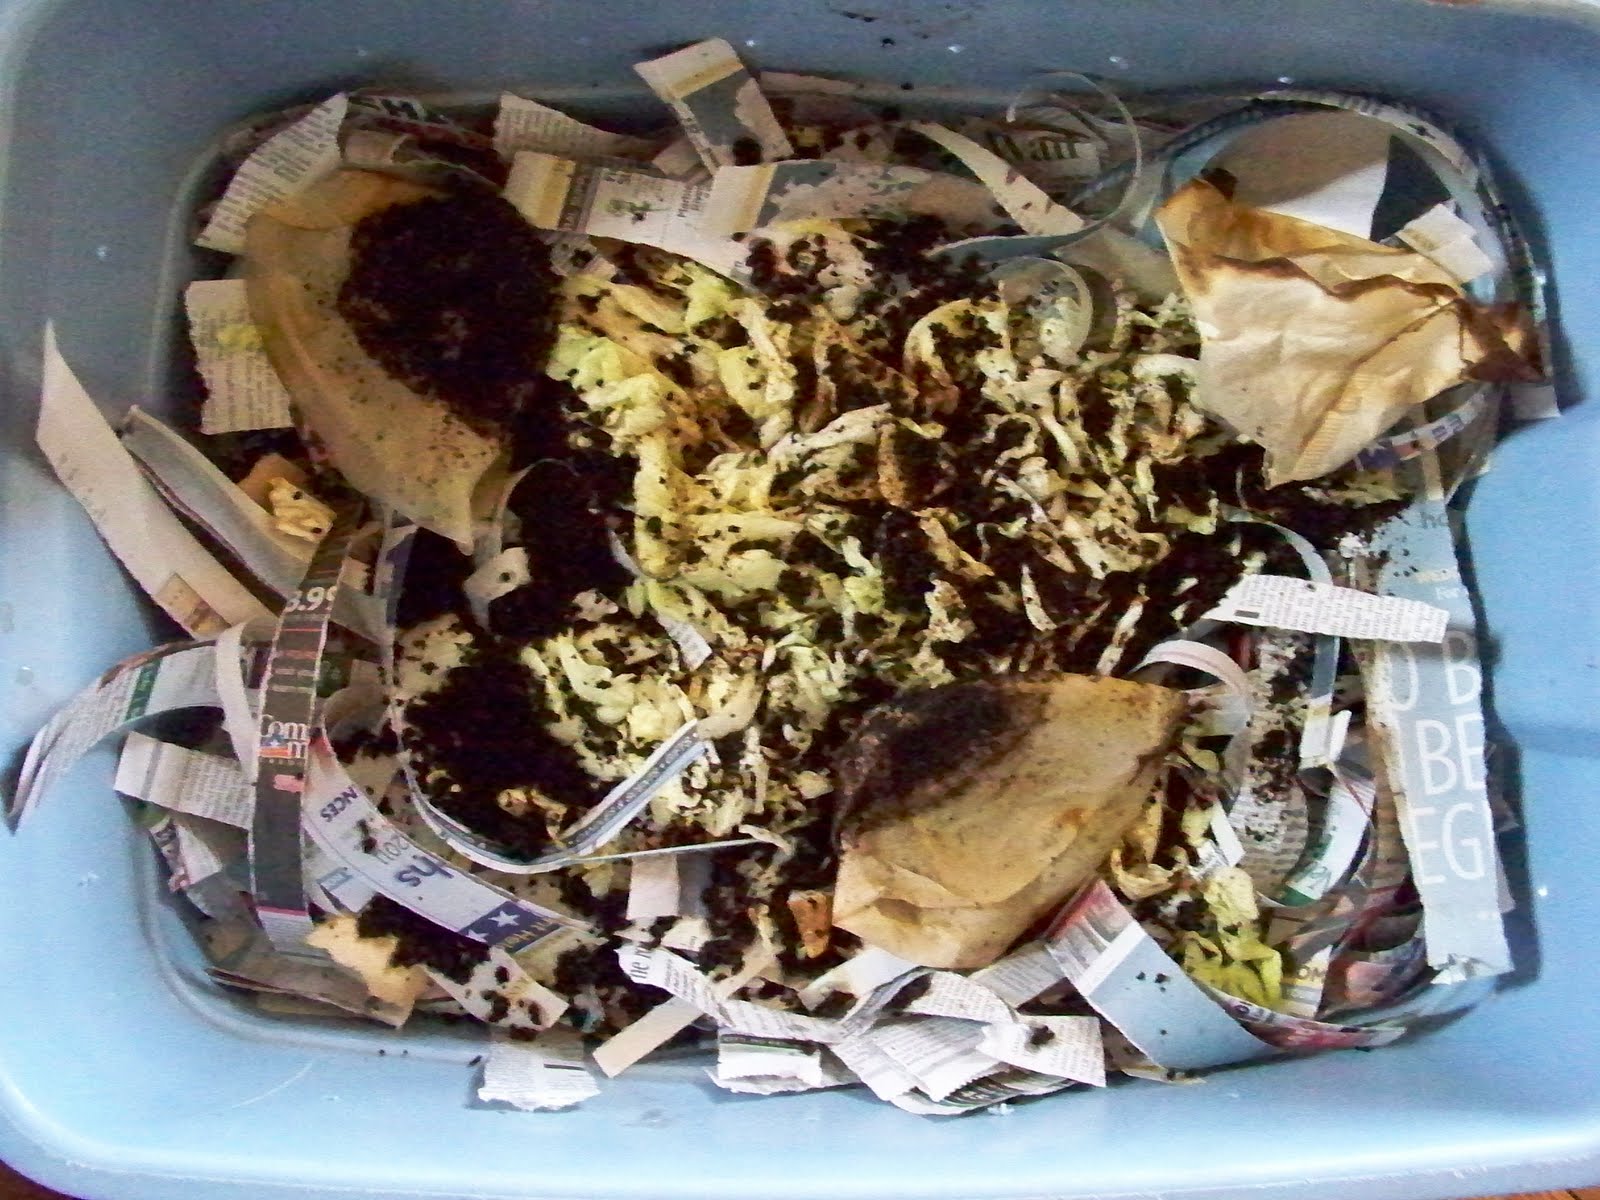
Step 4 Another damp layer of bedding
Step 5 another thin layer of kitchen food scraps
Step 6 Top layer of damp bedding

Step 7 Add your red wiggler worms and place top on bin

Worms do not like light, be sure your bin/container is opaque. Be sure not to over feed. It will take your worms a couple of weeks to get acclimated. Do not feed any oils, dairy or meats. Only feed limited citrus', grains and starches. Keep bedding damp.
In a couple months you will have nutrient rich worm castings!
A great resource for more information is Red Worm Composting.
For a list of things you can compost in a regular composting bin check out I Can Compost That?
Happy Vermiposting!
Neat idea. Do you do this overwinter? And if so, where do you store it? Right now, we have a lidded pail under the sink where I scrape scraps. Every week (or as needed) we empty it into our big compost bin in the back yard. In the winter, we empty the pail into a Rubbermaid tote on the back deck, then whenever it's full, Shane will haul it out and dump it in the main bin. Saves us tromping through the mud and snow all the time.
ReplyDeleteWe will soon have a total of three compost bins: one finished and ready to use, one in the mid stage, and one in the early stages.
Annie great job on your three working bins. That's the best way to do it. We keep the worm bin in different spots. In the garage until it gets too hot (easier access) and then I take it to basement where it's cool but does not freeze.
ReplyDeleteI have one that stays in my garage. It looks just like yours. A great homeschool project!
ReplyDelete